
How to use Formly with Relume
How to use multi-step forms with Formly and Relume components.
In this doc you’ll learn:
- What is Formly and how does it work
- How to get started quickly with Formly
- How Formly is implemented into Relume components
- How to customize components with Formly
- How to test and troubleshoot Formly components
What is Formly and how does it work
Formly allows you to create multi-step forms while designing natively in Webflow. It layers JavaScript using custom attributes to extend the functionality of the native Webflow forms element.
All of our multi-step forms that use Formly work with the free Formly plan. If you want additional functionality such as conditional logic (Formly Logic), dynamic form fields, form memory and many other features you’ll need to sign up for a Formly Pro plan.
How to get started quickly with Formly
To quickly get started with Formly, you’ll follow these steps:
- Paste in the script tag into your footer code found in your Webflow Site Settings. You can also paste this into the footer code for just a page.
- Paste in a multi-step form component.
- Publish.
Formly Production Script
<script src="https://cdn.jsdelivr.net/gh/videsigns/webflow-tools@latest/multi-step.js"></script>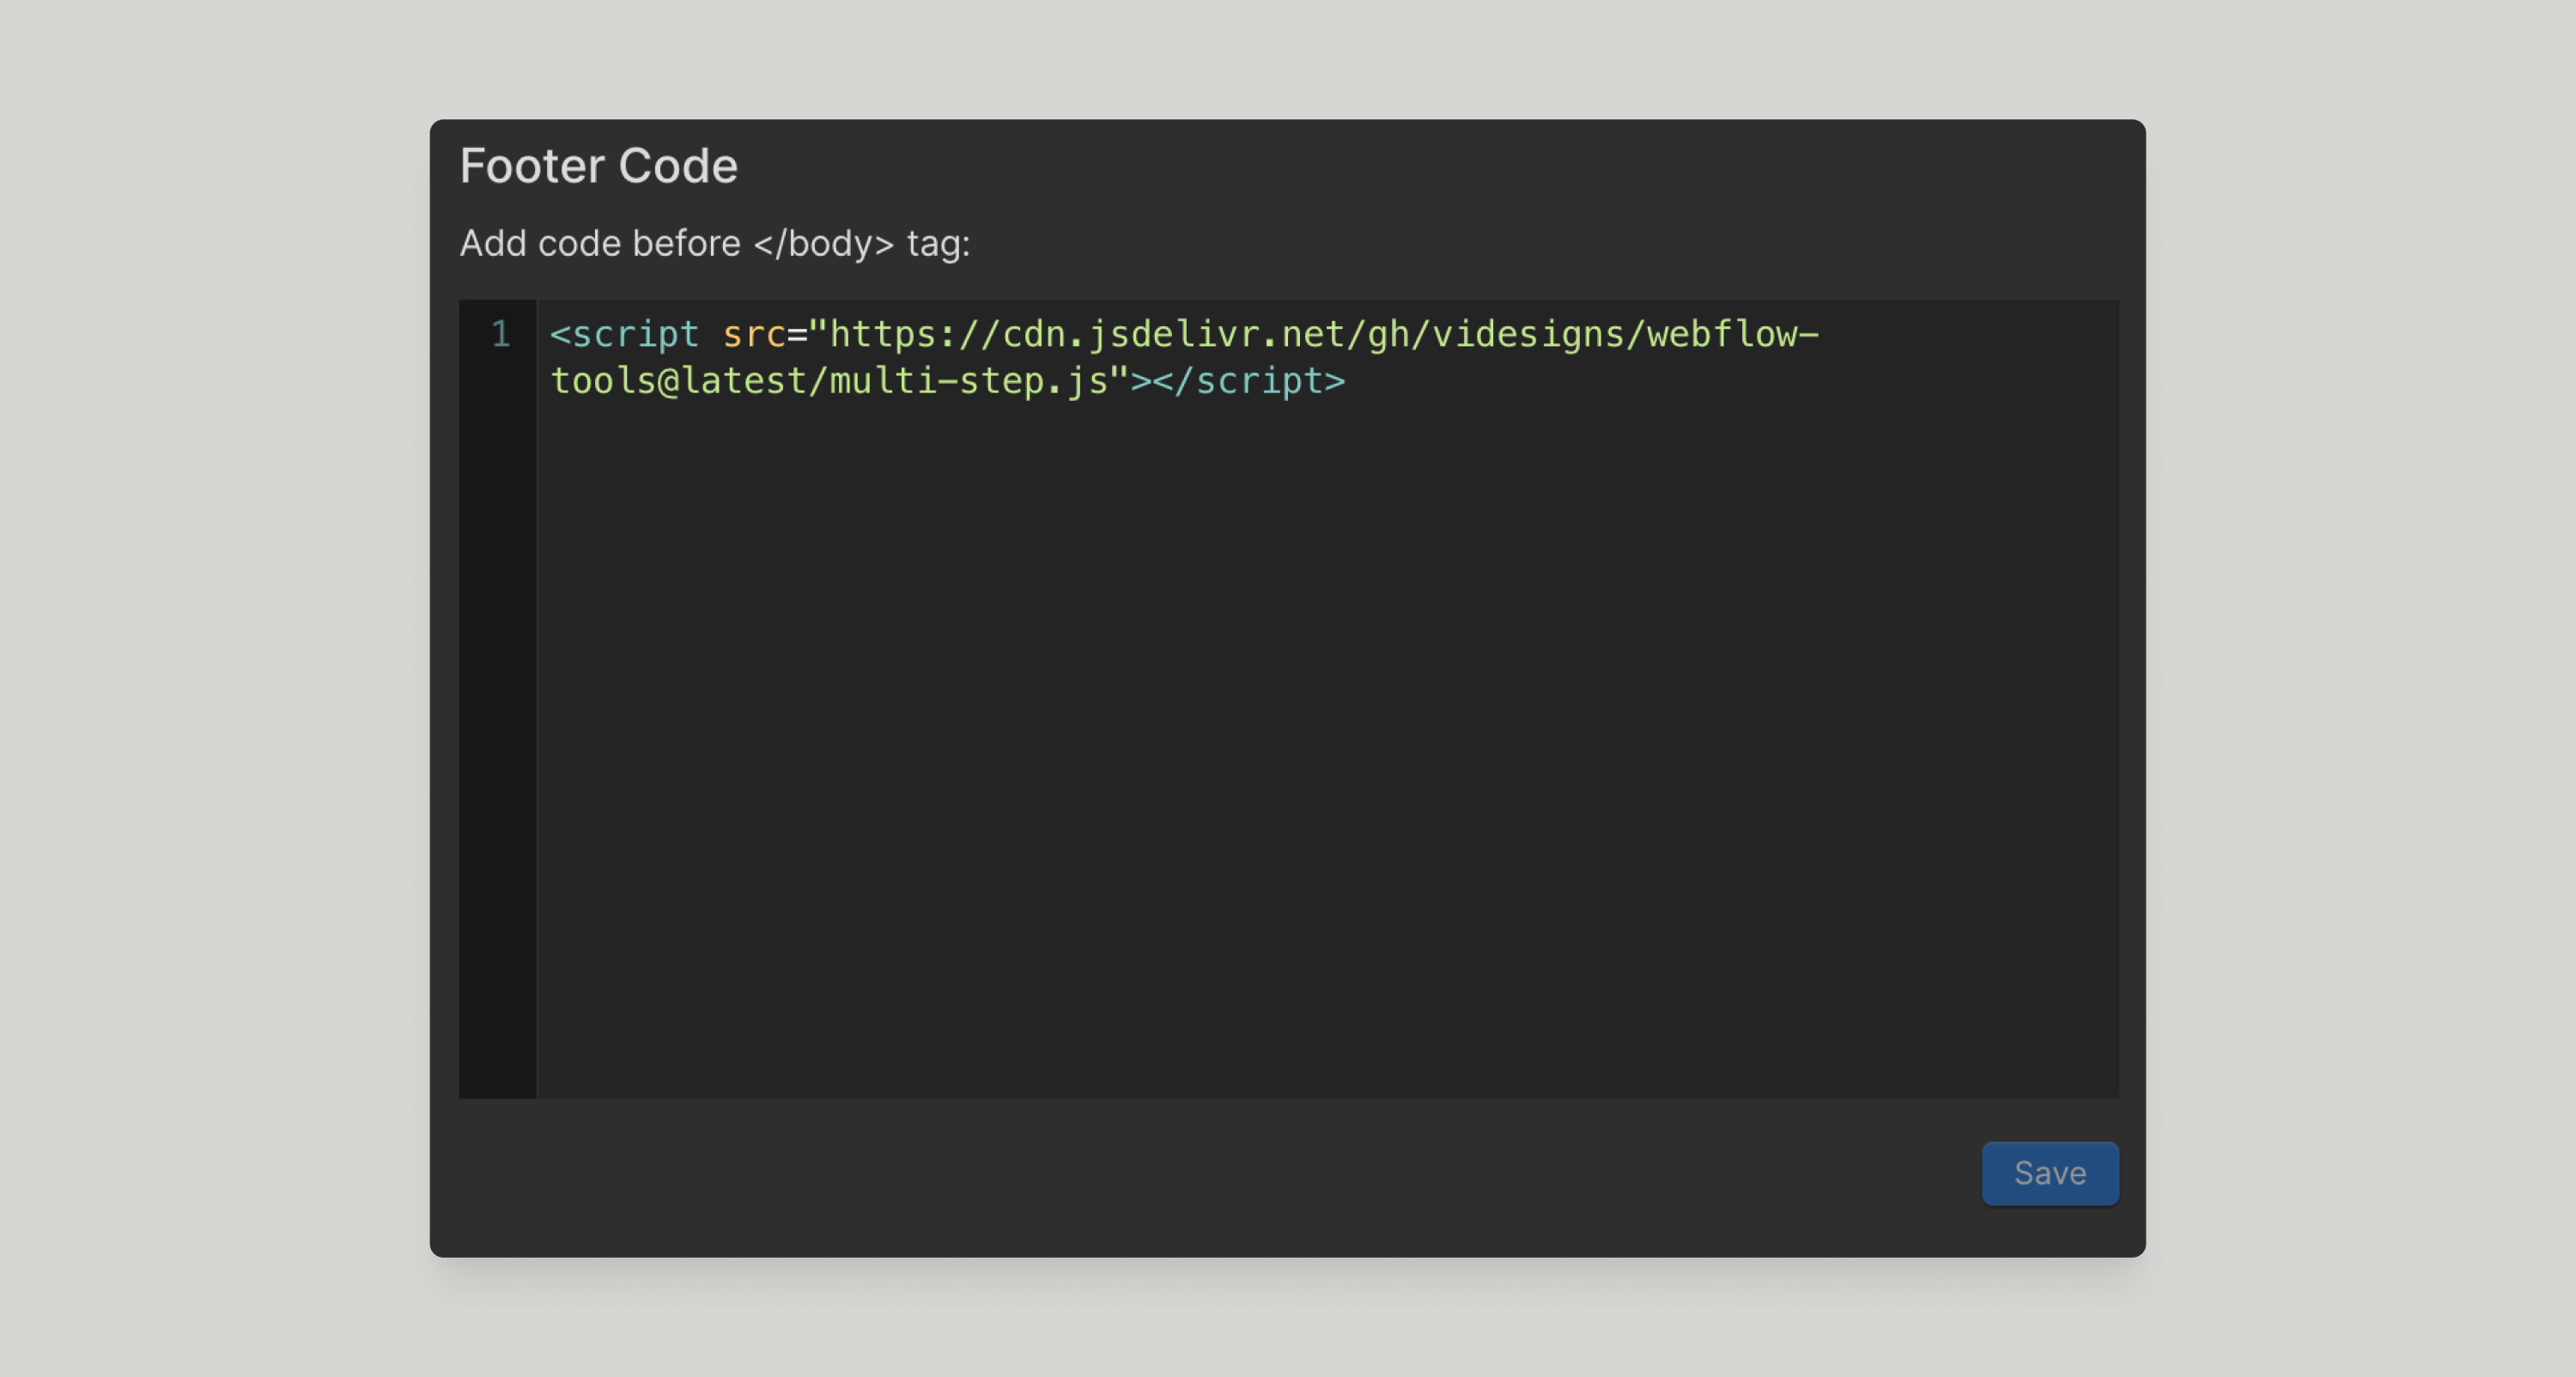
How Formly is implemented into Relume components
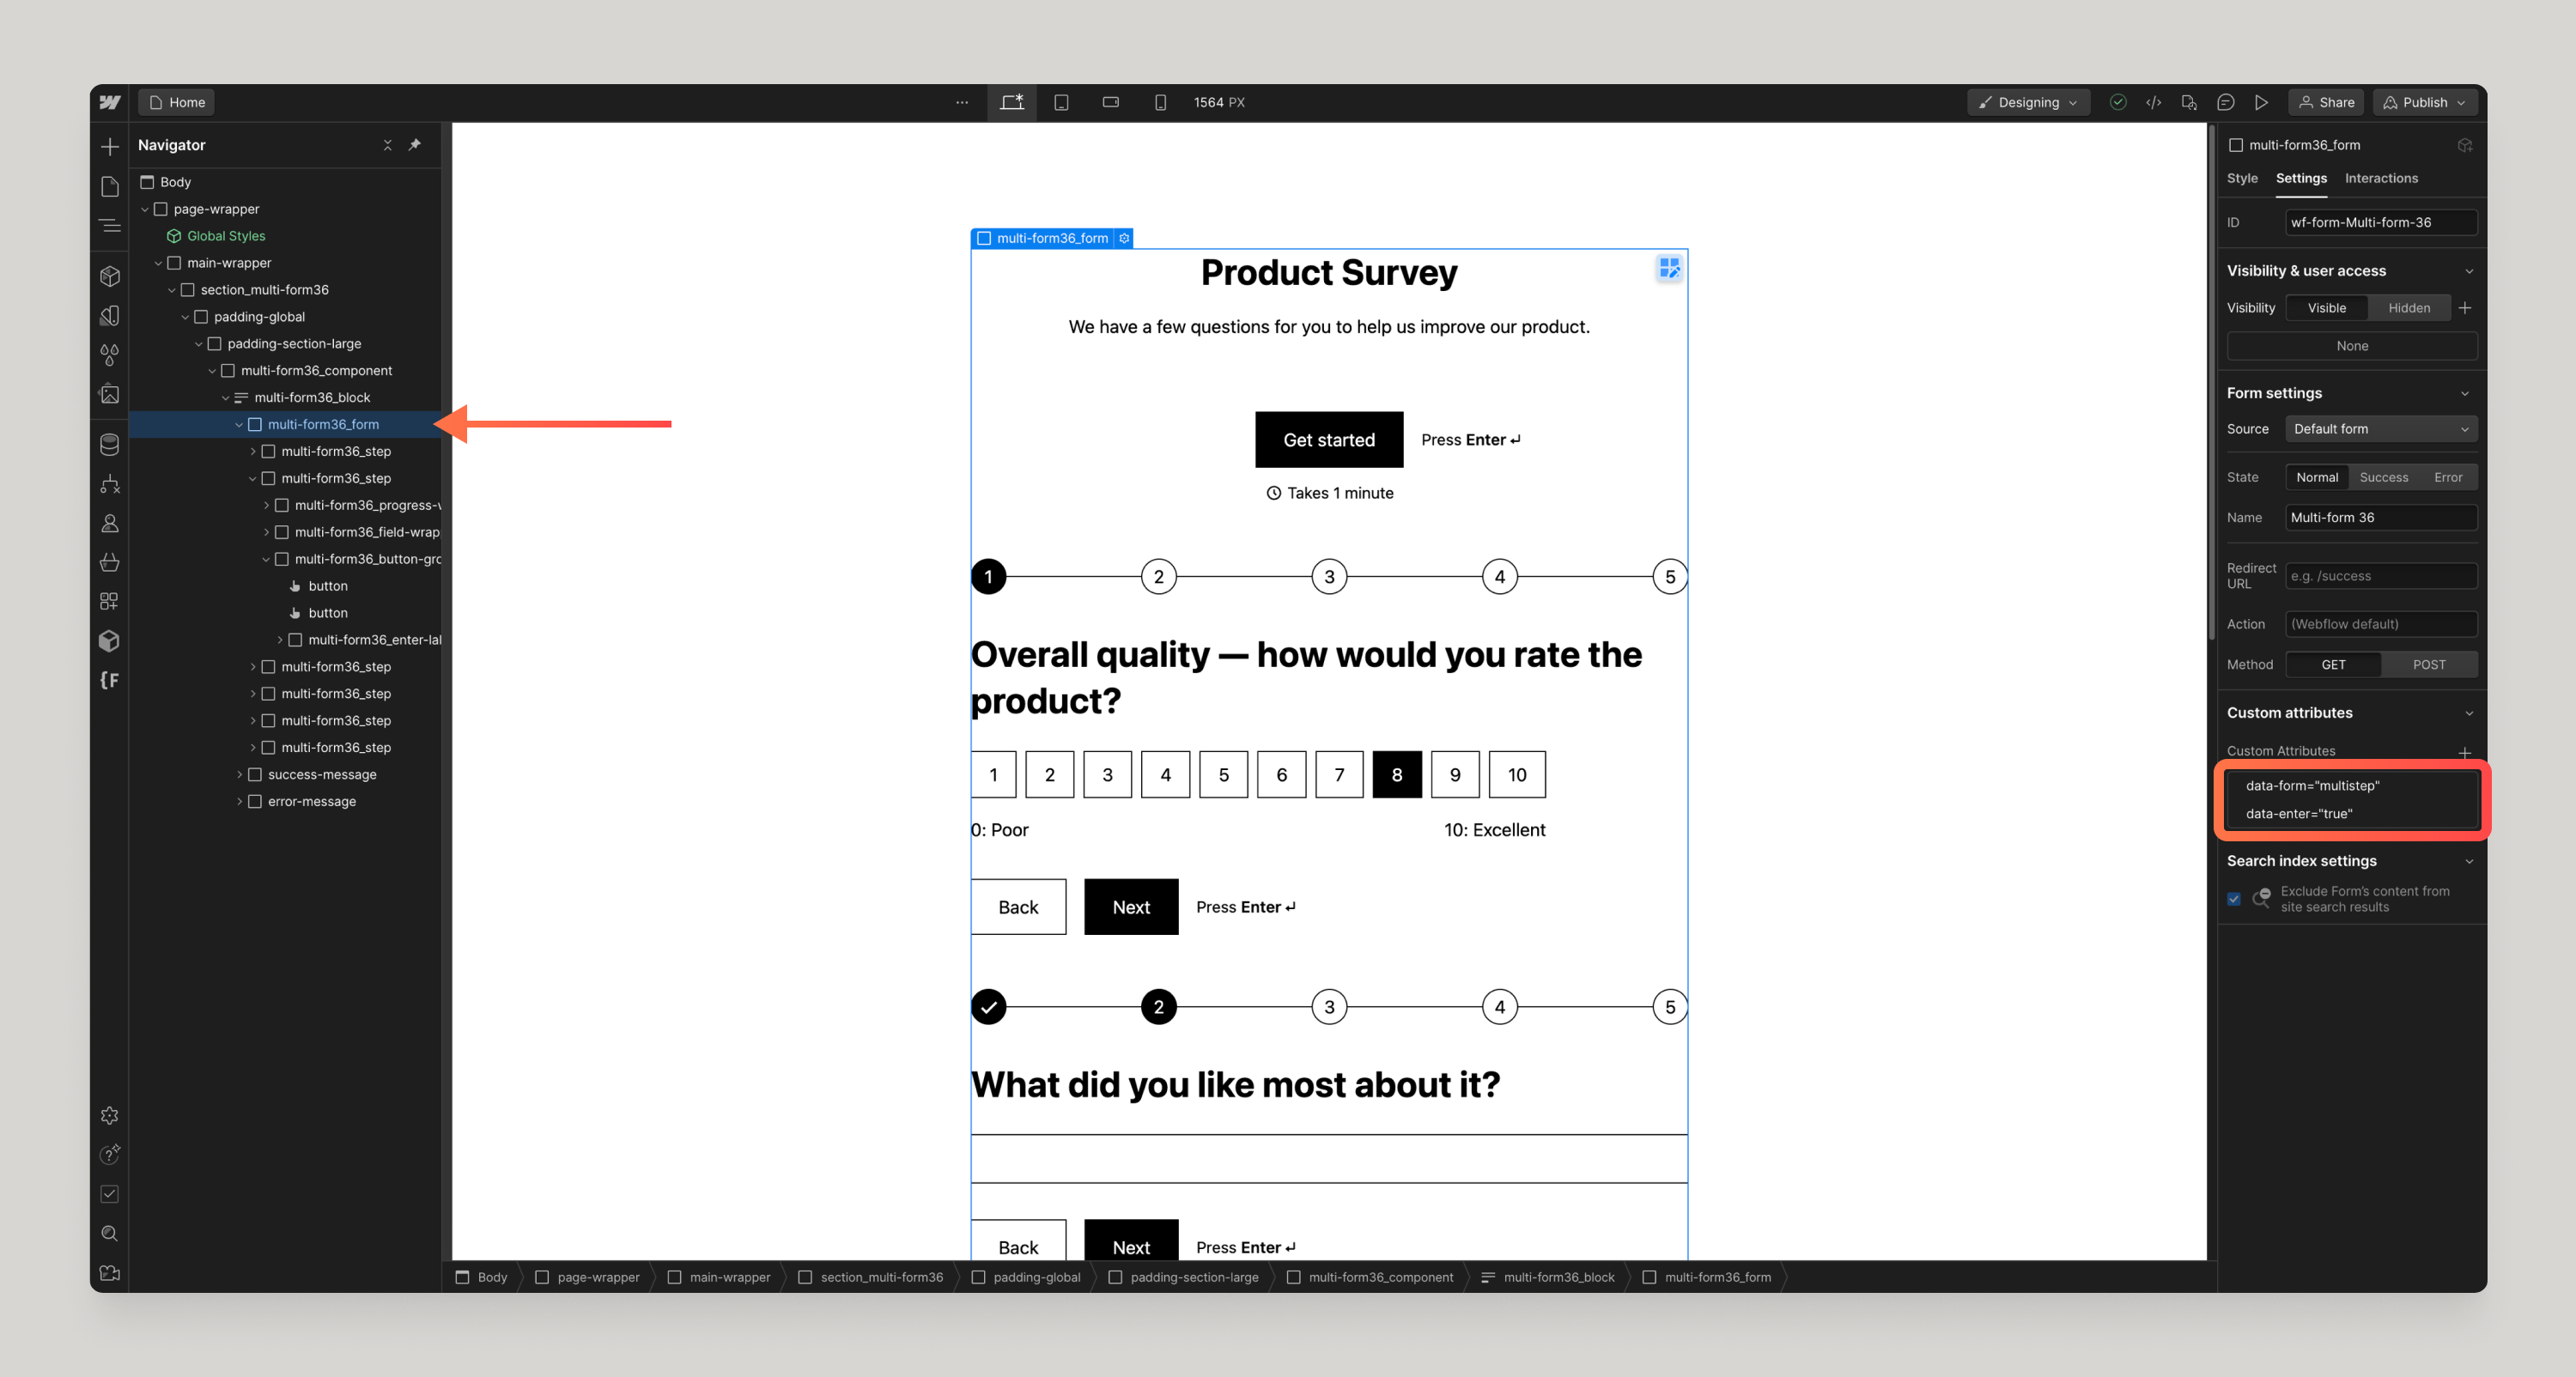
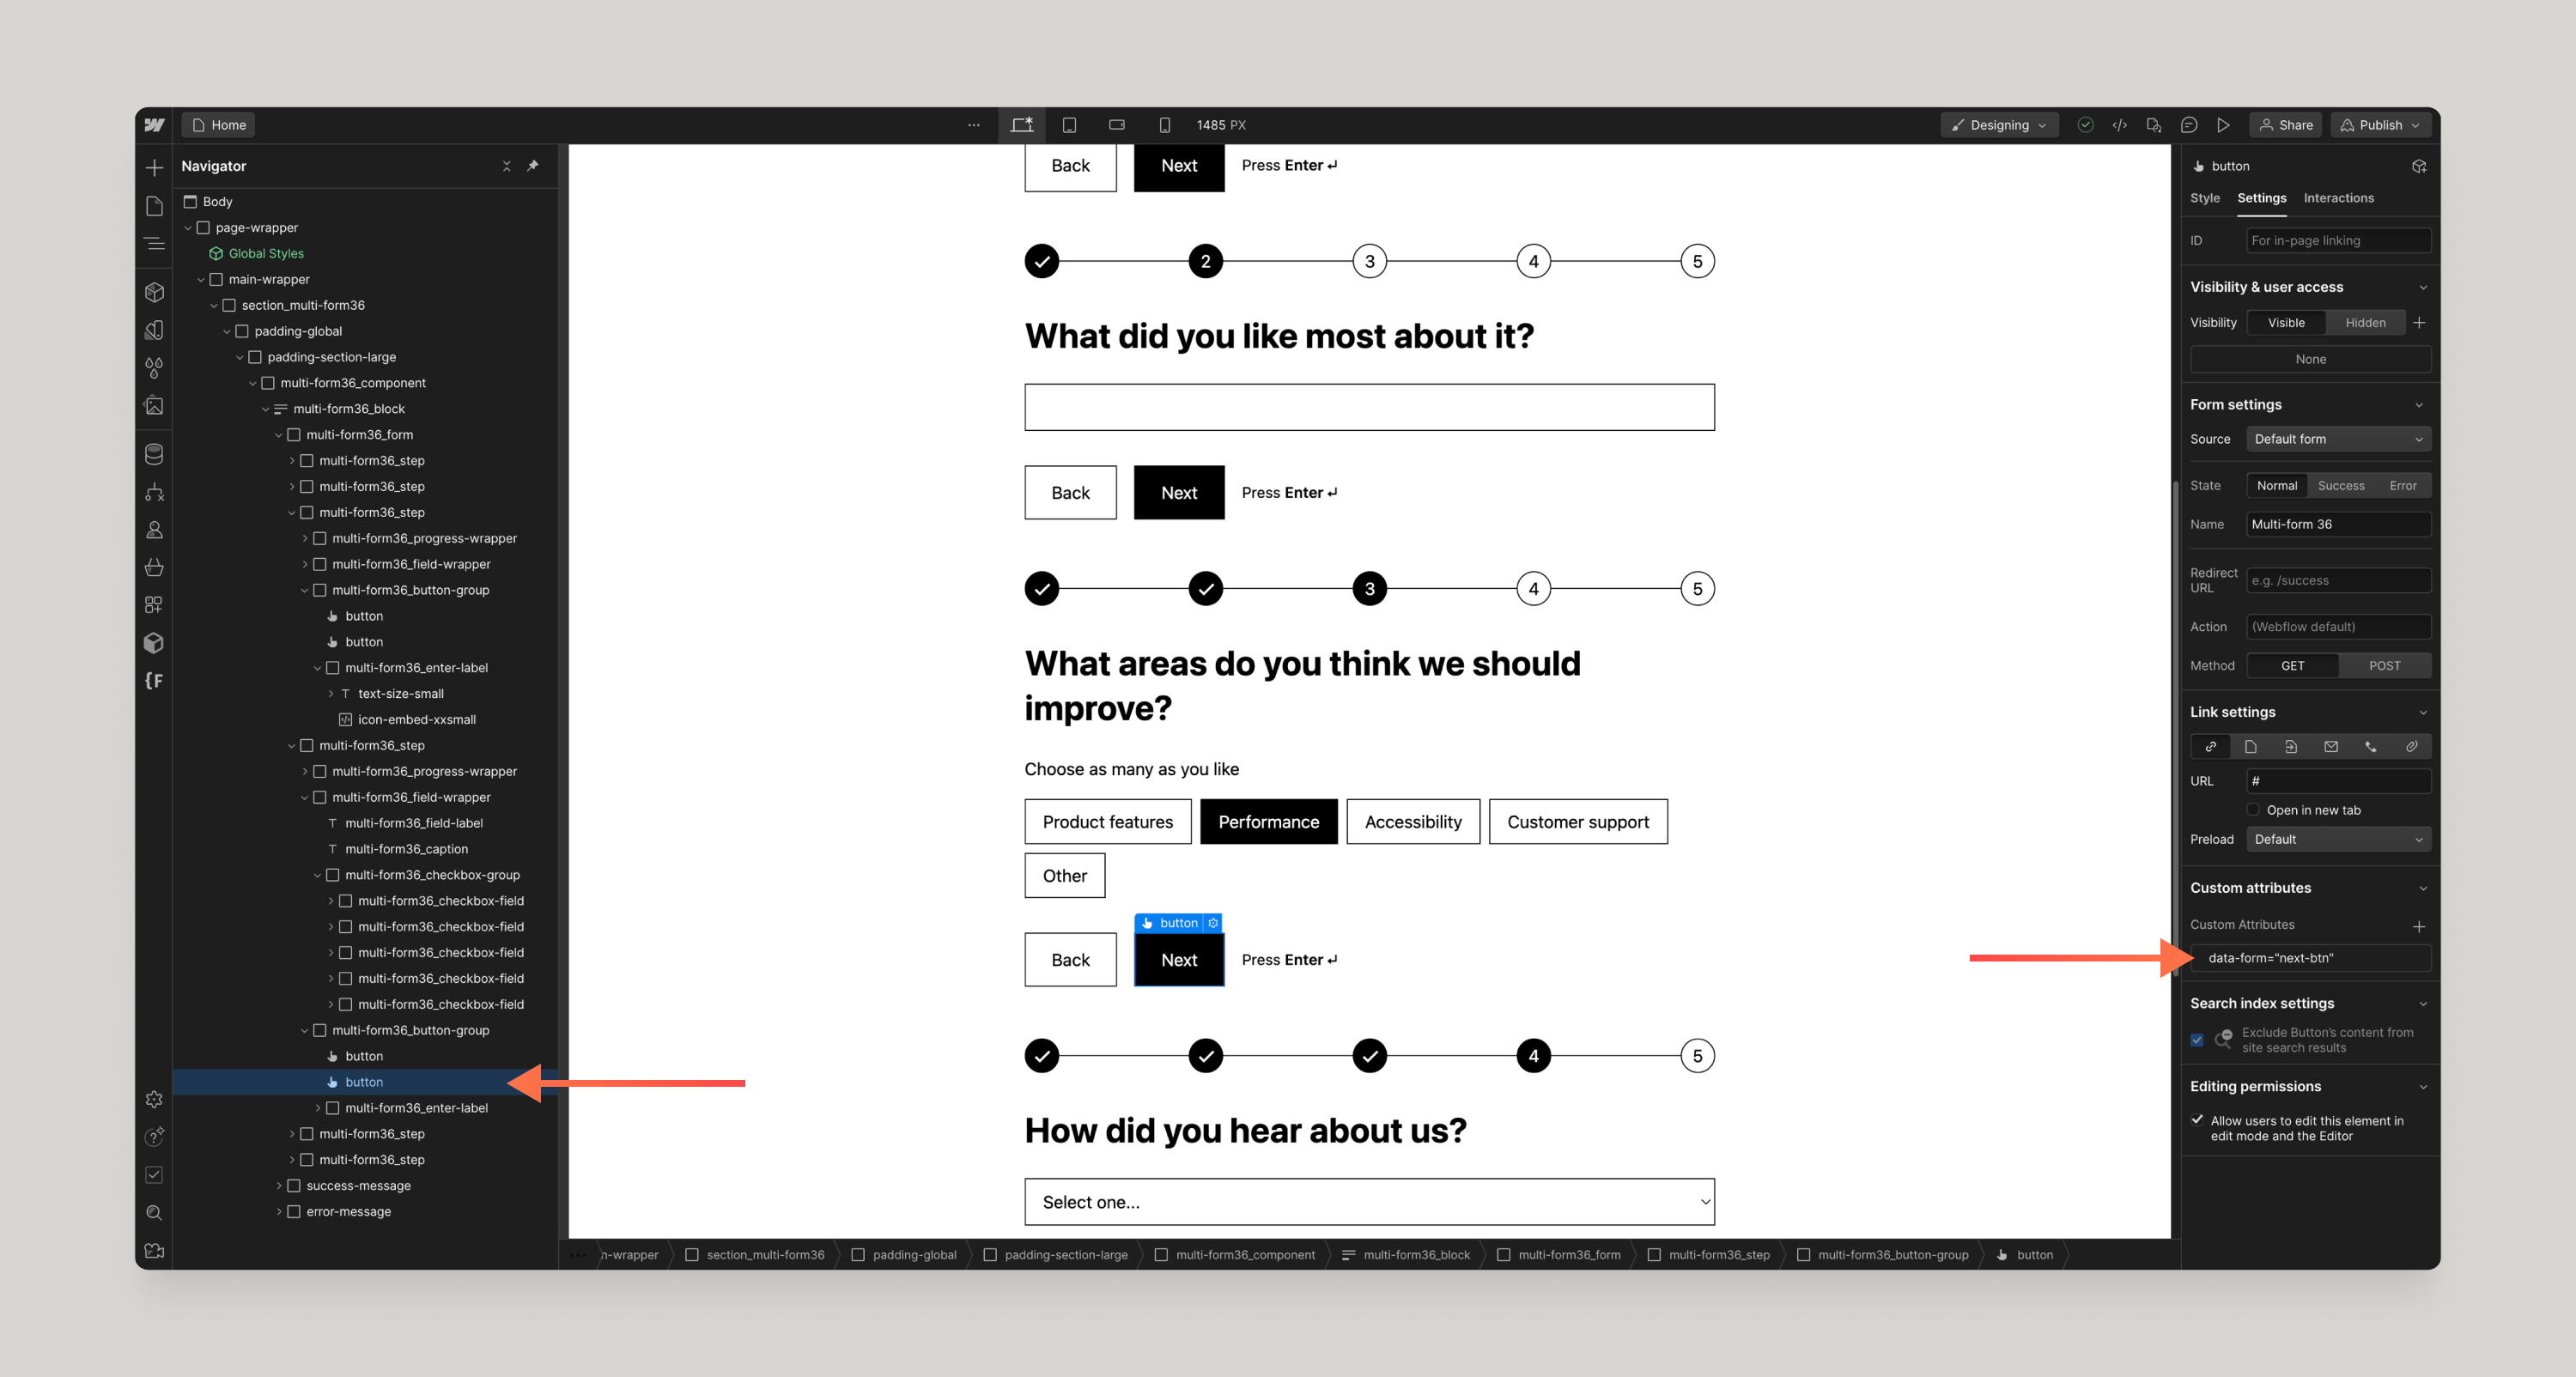
You essentially have 5 main attributes that every multi-step form requires:
- “data-form=”multistep” added to the “Form” element, not the “Form Block” element - This tells Formly that this is the multi-step form.
- data-enter=”true” - this lets users hit enter to advance to the next step.
- data-form=”step” - this tells Formly that you want this wrapper to be a step.
- data-form=”back-btn” - this tells Formly that this button is the back button and to go back one step.
- data-form=”next-btn” - this tells Formly that this button is the next button and should move one step forward.

Some Finsweet Attributes required
In order to get certain checkbox and radio button styles to work, you’ll need the Finsweet Input Active attributes script in the </head> of your page or website.
<!-- [Attributes by Finsweet] Input Active Class -->
<script defer src="https://cdn.jsdelivr.net/npm/@finsweet/attributes-inputactive@1/inputactive.js"></script>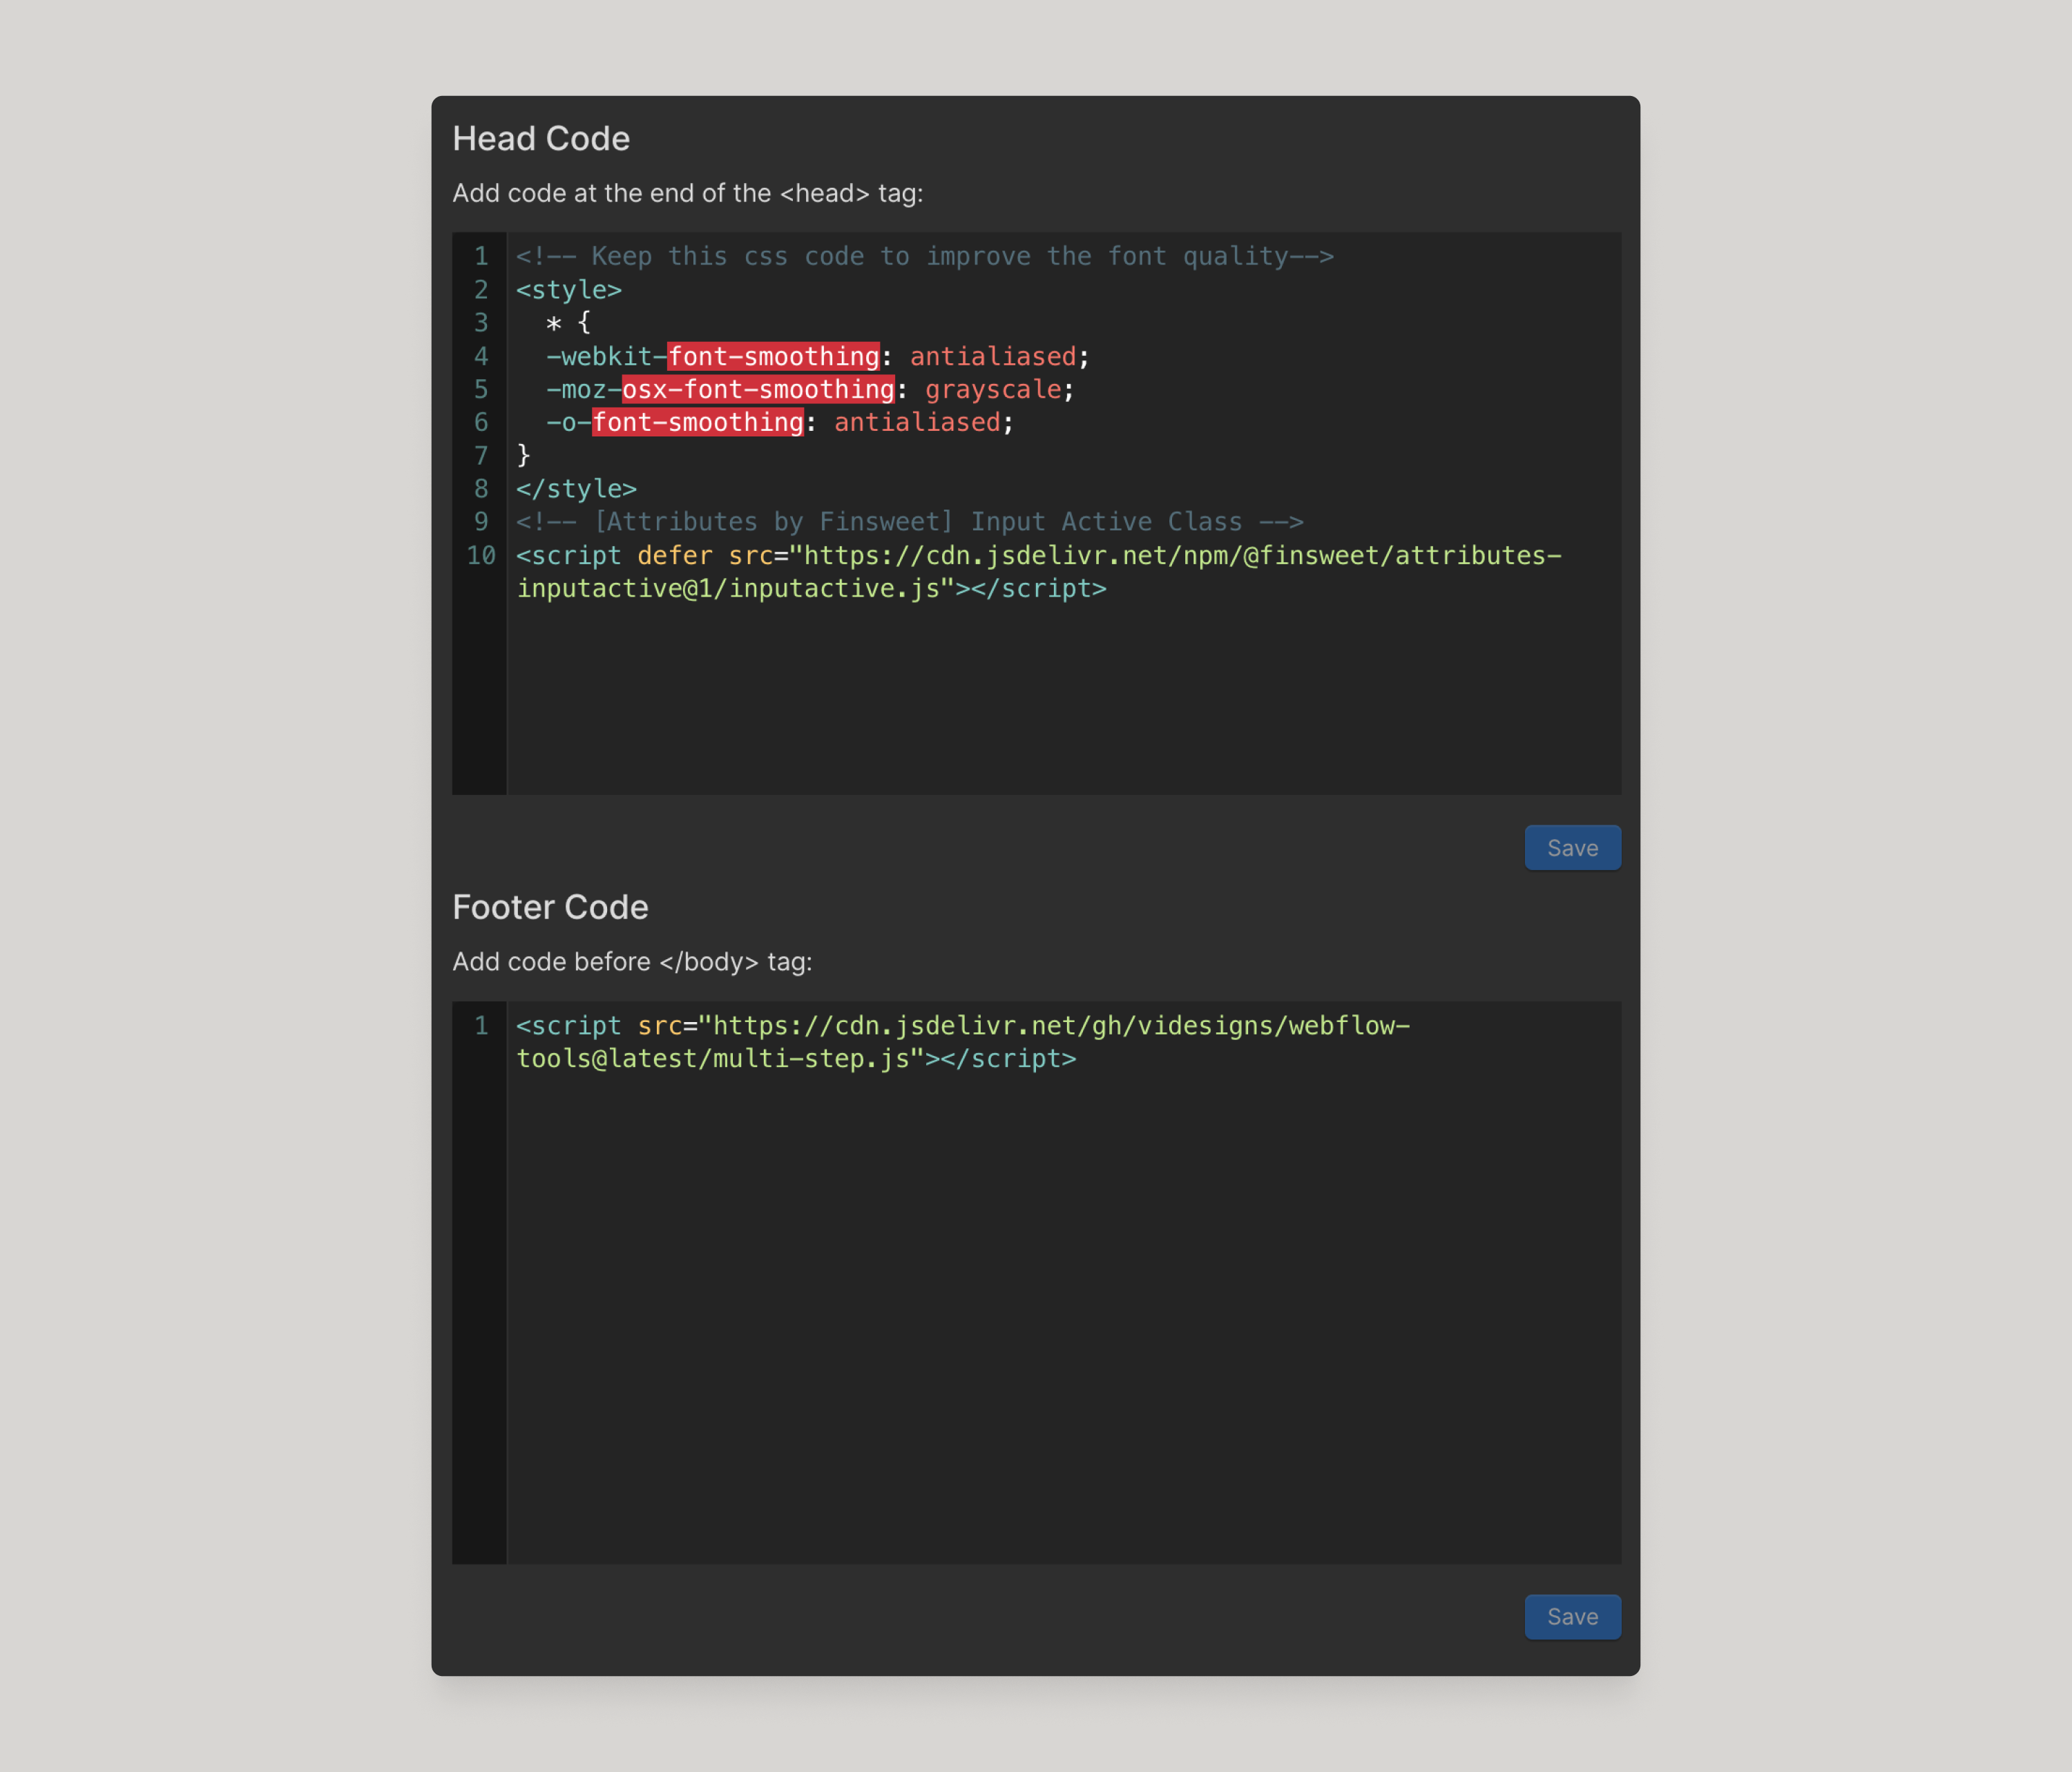
How to customize components with Formly
Below are some things to keep in mind while you are customizing the Formly multi-step forms using Relume.
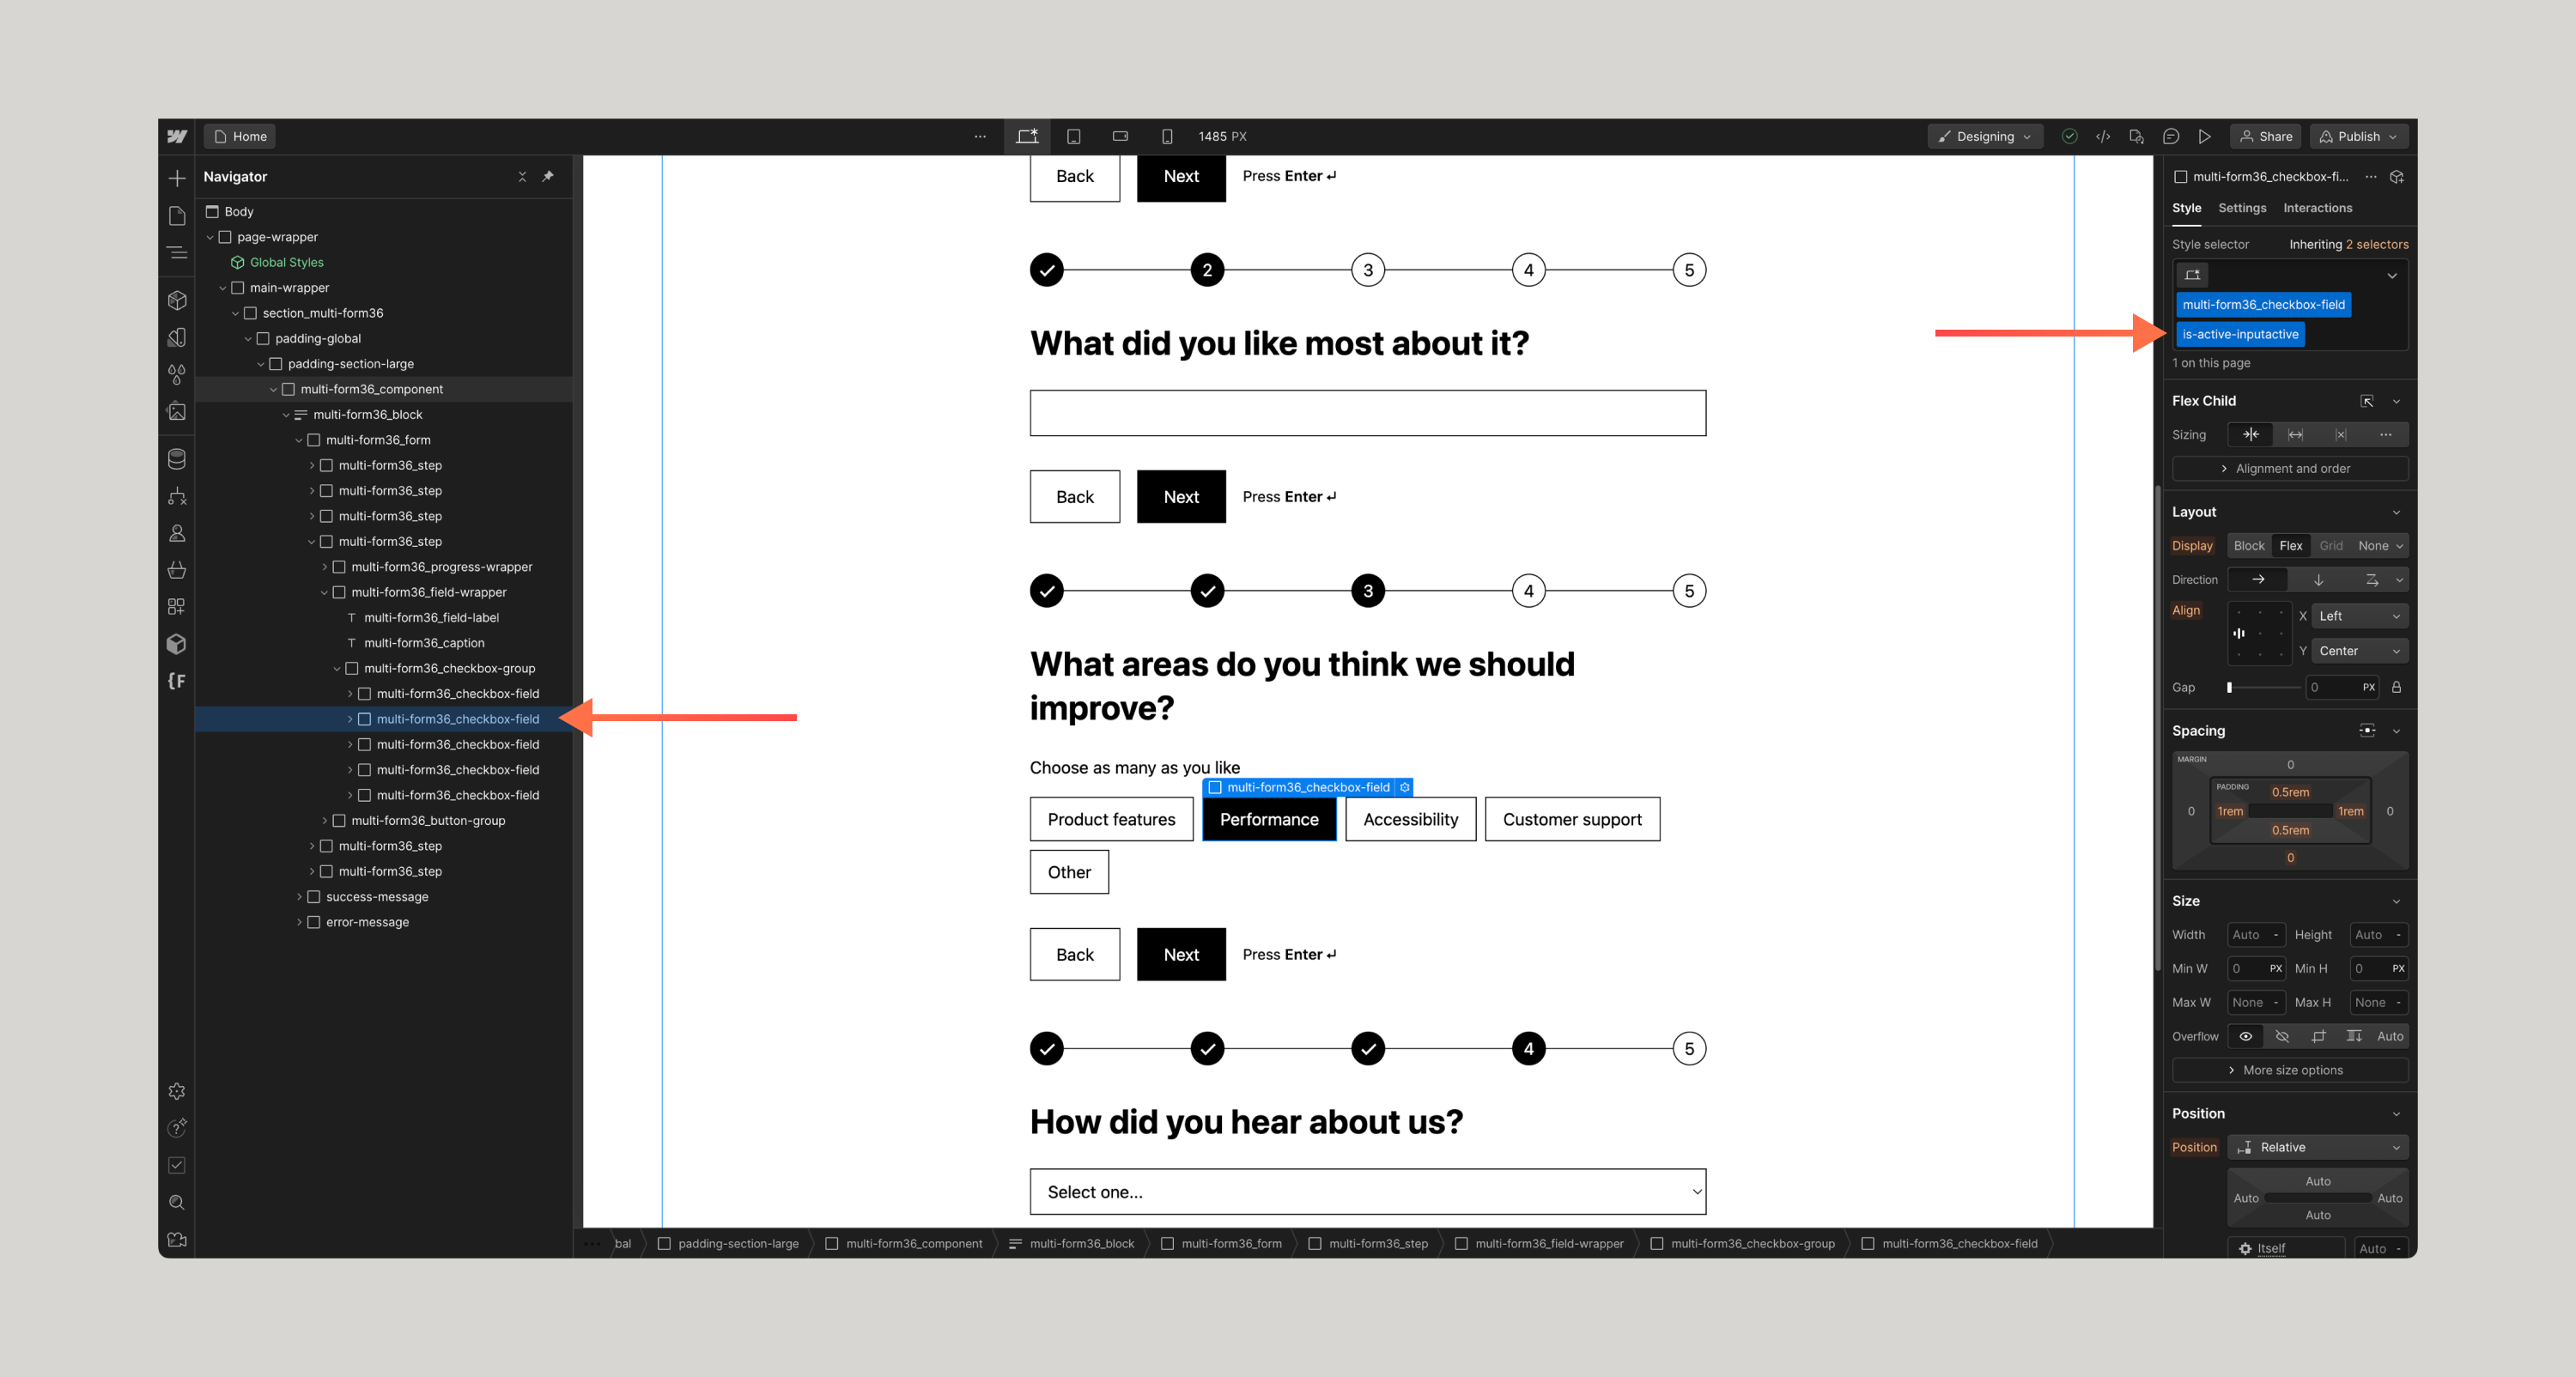
Customizing Checkbox/Radio Buttons
Be sure you are selecting the right element when you want to customize the active state of a checkbox or radio button. You’ll want to find the is-active-inputactive class as this is what the Finsweet Attributes Input Active will be targeting for the active class - unless you have specifically customized this.
How to test and troubleshoot Formly components
Below are the following steps and tips to test and troubleshoot Formly components.
- Be sure to publish and view your form on staging to do an effective test. The multi-step components require custom code in order to work properly and the only way custom code can execute is on the published site.
- Hold off on marking fields as required until you are fully tested and customized the form - this will save you a lot of time trying to navigate through steps.
- Be sure to keep an eye on the field names and values so that they are unique. If your values are not unique, when the form gets submitted, you won’t know which option the user chose. If your field names across text input or textareas are the same, again you won’t know which question the user answered.


Using Formly with Relume components is a very powerful way to level-up your next Webflow form - if you run into any issues please jump into our Slack Community.
Give feedback
Was this resource helpful?
Related


For account-related issues, please contact [email protected].
